Flats Fishing:
What to bring List
The #1 Guide on the Internet for Bonefishing in the Bahamas and Carribean
The #1 Guide on the Internet for Bonefishing in the Bahamas and Carribean
Flats Fishing:
What to bring List
The #1 Guide on the Internet for Bonefishing in the Bahamas and Carribean
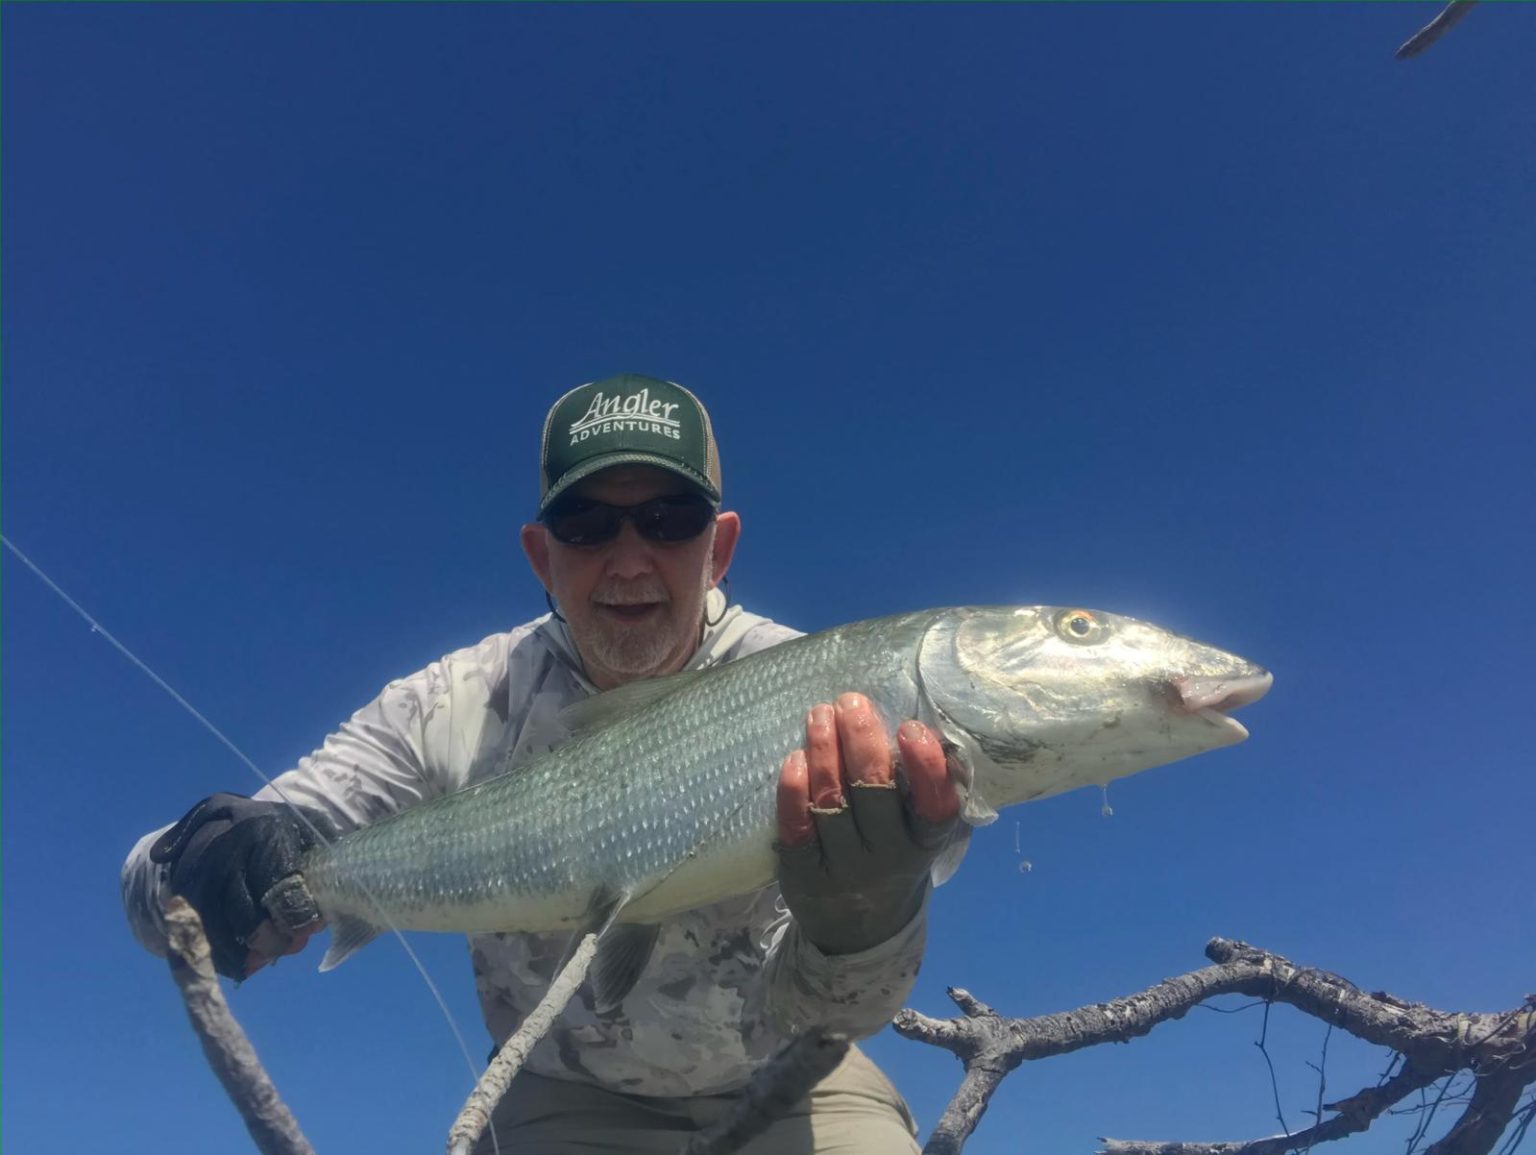
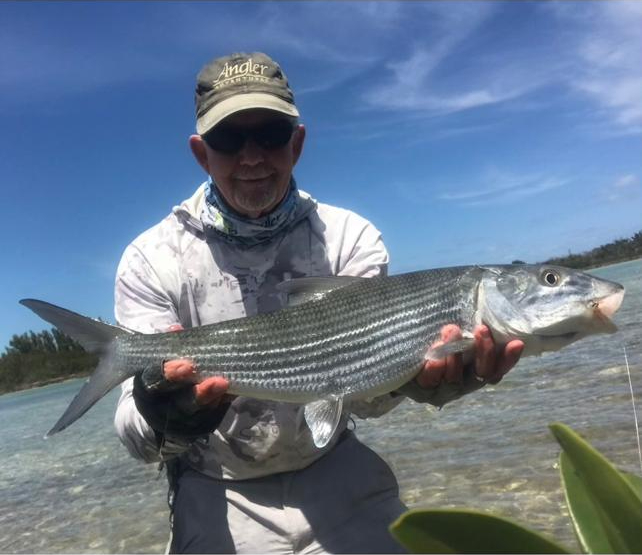

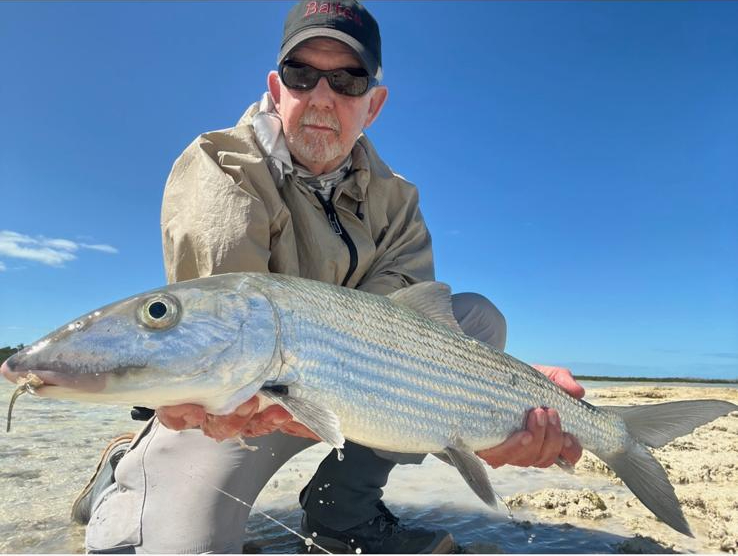
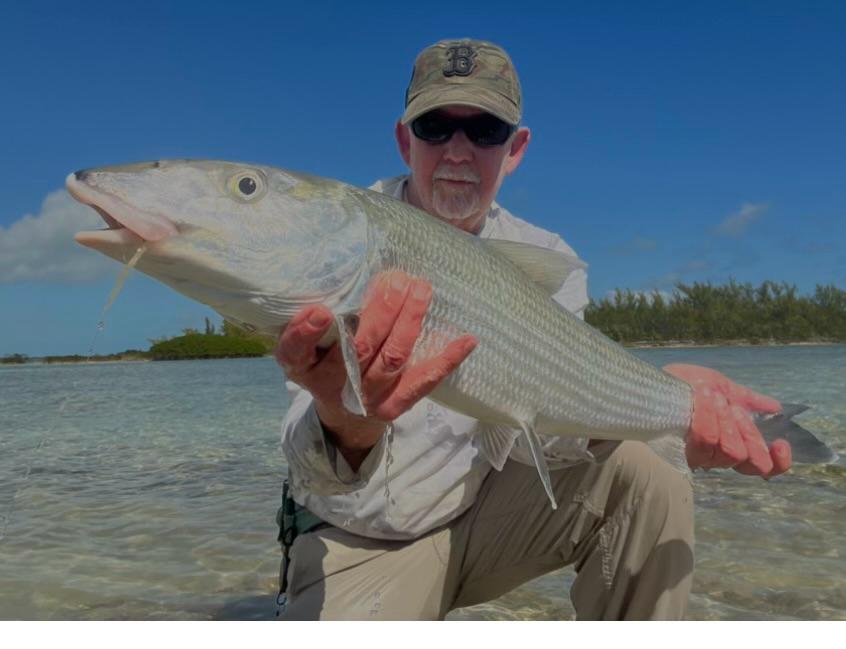
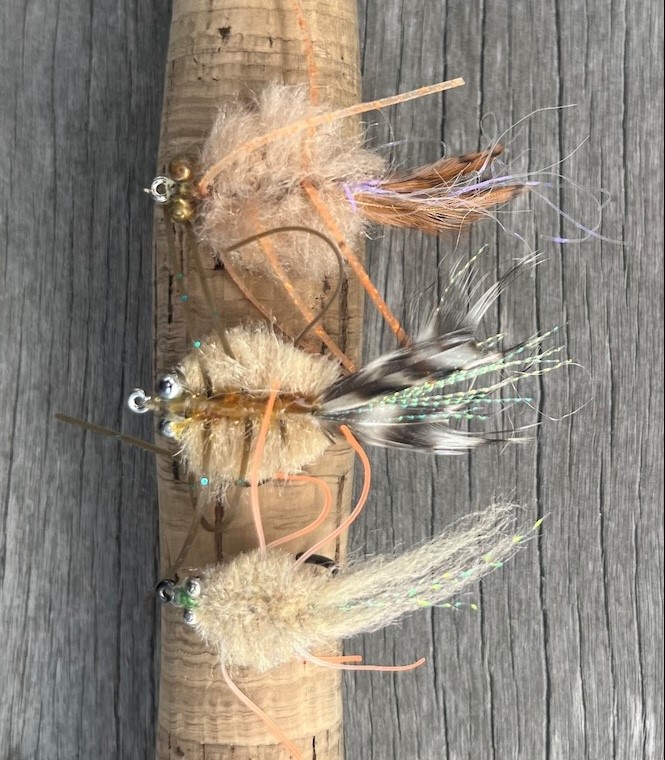
Our Flats Fishing “What to Bring” List has evolved in leaps and bounds over Angler Adventures 40-year history. This year, it’s undergone a major overhaul! We’ve brought it up to date and made it twice as informative. It’s loaded with nuggets of bonefish strategy and wisdom. We’re even pulling back the curtain, introducing its originator, Chip Bates (see photos above), who spent much of his 33-year career fly fishing for bonefish, tarpon, and permit around the globe and the past 7 years of retirement whispering to bonefish.
Here’s a sampling of what you might learn about fishing from the flats from the #1 guide on the Internet.
Highlights
We’ve expanded our “list” with suggestions and tips to help you understand not only what to bring, but why to bring it!
Essential tackle while wading includes: Pliers, hook sharpening file, box of flies, extra leader material, and water.
One of the biggest mistakes is to not adjust your fly to changing water depths. Your fly should be weighted so it sinks to the bottom quickly and stays near the bottom when you strip. A good rule of thumb is that your fly should reach the bottom in 3 seconds.
The investment of $70-$100 on a new fly line is one of your best investments prior to an important trip. Check the condition of your backing too.
Tips
“Bonefish like crab flies as much as permit – maybe more!”
“The most important thing you can do before casting is to stretch your fly line”
“Cast very close to a tailing fish, as he is focusing on a small area.”
“Many anglers use too thin or too light a tippet. We recommend the strongest tippet practical for the situation.”
The best tailing habitat is a weedy bottom; you’ll need a weedless fly.
Don’t judge the tide by surface activity. Kick up sand and watch how it moves.
Better to cast short than too far and spook the fish.
Improve Your Fish-Spotting Skills
More Crab Adulation & Photos
The Secret to Fly Selection
To Strip or Not to Strip
“When a bonefish takes the fly, you will feel resistance with your line hand as you beging the “strip” part of the retrieve. Normally, this gradual pulling against the resistance is all you need to set the hook. Avoid setting the hook with the rod.”
“A fish coming at you has less chance of seeing you than a fish on either side.”
“You must go light in skinny water, meaning no weight other than the hook”
“The most common mistake is to take too many false casts – no more than 4.”
“Every time you tie on a fly, test the knot strength before fishing! Be sure to check your hook point after catching a fish and keep it sharp!”
“A dropping fly will invariably result in a take from a fish. If he goes nose down, tail up, he’s taking your fly!”
“Check your leader regularly for wind knots or abrasion and replace if worn or weakened.
“TEST YOUR KNOTS! More fish are lost due to leader or knot failure than any other reason!”
We refer to the information you’re now reading as our “What to Bring” list. Actually, it is more than a list because a list, in and of itself, is not analytical. We have expanded our list with suggestions and tips to help you understand not only what to bring, but why to bring it. This information has been tested over decades and hundreds of fishing trips and we stand behind it.
This information will serve you well whether you’re fishing the Bahamas, Turks & Caicos, Mexico, Belize, Venezuela, Seychelles, Christmas Island, or Mauritius. Every location or guide will have its own “hot flies”, and those will be listed in your Angler Adventures itinerary, but most are variations of the flies listed here.
Bahamian and Caribbean fishing lodges that provide tackle are clearly in the minority. Some lodges have a minimal amount of “back-up” rods and reels for use in case of rod loss or breakage. However, even this equipment is often in poor condition. Some lodges carry a smattering of flies and lures, but always seem to be “out of” the best patterns. Unless your Angler Adventures itinerary clearly states that the lodge you are going to provides a full inventory of rod and reel rentals, leaders and flies, we recommend you bring all your own tackle and flies, including a minimum of two rods per angler.
RODS
Some people carry light rods (5-6 weight) for bonefish, but we’ve not found these light rods to be versatile enough. A 7 weight is useful in calm conditions, but 8 and 9 weight rods are preferable under normal/windy conditions, and you can still make a delicate presentation with an 8 weight rod, a long leader and an unweighted fly. You may want to bring a 10-weight rod for permit, barracuda, or sharks. If the destination you’re visiting offers large Tarpon, an 11-weight or 12-weight is standard.
We highly recommend 3, 4 and 5 piece “travel rods” that you can usually take with you on an airplane. “Usually” refers to the fact that your rod should fit in the overhead compartment, which varies depending on the size of the aircraft. 3 piece rods fit in the overhead compartments of most large capacity aircraft. 4 – 5 piece rods may be necessary for small commuter aircraft or “island hoppers”.
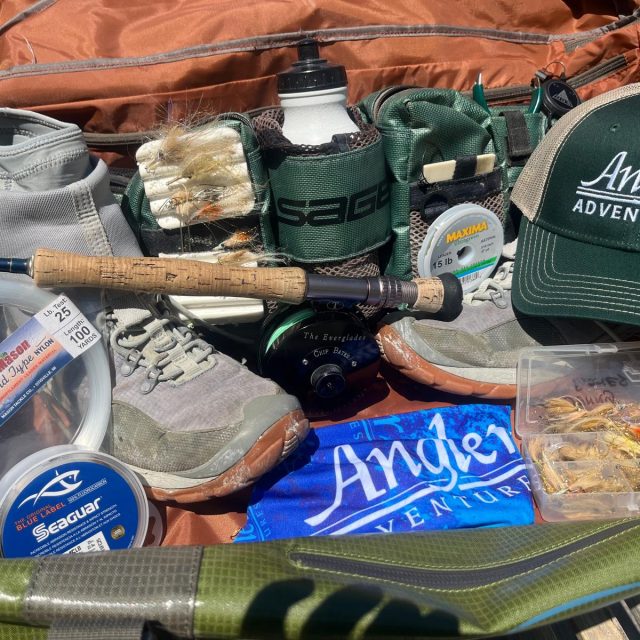
CARRY-ON BAG
In addition to rods that you can carry aboard an airplane, we strongly recommend that you also pack a carry-on bag with your reels, lines, fishing accessories, (except sharp metal objects which must go in your checked luggage) a change of clothes and all necessary medications.
REELS
We recommend anodized direct drive reels for salt water use, preferably with a sealed adjustable brake, cork disc drag, and a capacity of at least 150 yards of backing. There are now several choices for backing, from the traditional 20- or 30-pound test dacron, to smaller diameter gel spun backings.
LINES
The most popular line for bonefishing is a weight forward floating line. Cleaning your fly line will greatly enhance its ability to shoot through the rod guides. If your line is old, cracked or beyond cleaning, buy a new line. Investing in a new fly line is one of the most important tackle purchases you can make before an important fishing trip. In fact, many experienced anglers will bring new fly lines on each trip.
We used to list specific fly lines back when the choices were few. Today there are too many to choose from. However, most manufactures now make fly lines for each species: Bonefish, permit, tarpon. If in doubt, ask Angler Adventures for advice.
LEADERS
Many freshwater anglers make the mistake of using too thin or too light a tippet, which results in breaking off fish, particularly bigger bonefish. In saltwater, we recommend the strongest tippet practical for your fishing situation. If the bonefish aren’t leader shy, we recommend tippets of 15-pound traditional monofilament leader material such as Maxima “Ultra Green”, Ande, Rio Saltwater IGFA or other brands designed for use in salt water. Mason is a stiff, thick leader material that offers good abrasion resistance, as well as breaking strength. The stiffness of Mason makes it a good material for the butt section of the leader. It’s larger diameter and stiffness makes a nice transition between fly line and leader, improving the ability of the leader to turn over the fly. Maxima, Ande and Rio are thinner than Mason, if you prefer a softer material. Bring spools of 25-lb., 20-lb., 16-lb., and 15-lb. Mono and spools of 20 lb. and 15 lb. fluorocarbon to tie leaders using the formula in the “Leaders” section below.
If fish are spooky, or if you’re using small flies for tailing fish or fishing skinny water in general, we recommend fluorocarbon tippets added to conventional monofilament leaders. Seaguar or Rio Fluoroflex are good choices. Fluorocarbon is thinner than Mono, but still has sufficient stiffness and abrasion resistance for saltwater use. An 8-turn blood knot is more secure than most knots when tying fluorocarbon to conventional mono. When adding thin fluorocarbon tippets to regular Mono, it is important you don’t tie obviously dissimilar diameters together. You need to gradually taper down the diameter of your tippet for conventional knots to hold. That’s why the leader described below goes from 15 lb. Mono to 20 lb. fluorocarbon. Every saltwater angler should be familiar with the knots described four paragraphs below, even if he or she doesn’t tie his own leaders.
We recommend not going lighter than 15-lb. when using fluorocarbon tippets. We’ve had too many break offs with 12-lb. fluoro.
If using straight mono leaders, instead of fluorocarbon tippets, we still recommend using a 15-lb. tippet. When fishing in very shallow water (8-12 inches), in bright sunlight over spooky fish, you’ll need to lengthen your leader to 14, 16 or even 18 feet! In these conditions, we recommend a fluorocarbon tippet, because its small diameter may be less visible to fish and fluoro sinks more than mono, which is helpful when casting small flies.
Standard leader length is 9 – 10 feet. On a windy day, shorten your leader to 7 – 9 feet. On a calm day, lengthen your leader to 12 – 14 feet (or more). In either case, test how your leader turns over the fly under the conditions that day and make any necessary adjustments.
BONEFISH LEADERS
Remember, we recommend the strongest tippet possible for your fishing situation. The following are examples.
Mono to Fluorocarbon Leader: For the first 3 sections use Mason: A 4′ butt of 25-lb, 2′ section of 20-lb, 18″ of 16-lb. Then add 2 sections of fluorocarbon, as follows: 18″ of 20 lb.; 2′ of 15 lb. makes an 11-footer.
All Monofilament Leader: Again, we use Mason for first 3 sections: 4′ of 25 lb., 2’ of 20 lb., 18″ of 16 lb. Then add 18” 20 lb. Maxima Ultragreen and 2’ of 15 lb. Maxima Ultragreen gives an 11-footer.
PERMIT LEADERS
Permit leaders should be between 9 – 14 feet long (depending on conditions), have heavier and longer butt sections (to help turn over the heavier flies) and the tippet should be between 15 – 20 lb (Permit aren’t typically leader shy). Having a well-constructed permit leader will help deliver the fly within 2 feet of the fish’s nose, the best place to get the permit to see the fly, without giving him a chance to study it! Permit aficionado Del Brown preferred simple leaders. Del’s leaders were about ten feet in length: six feet of 50 lb test, two feet of 30 lb test, and two feet of tippet material, 15 lb or 20 lb. He used a Blood knot or a Surgeon’s knot to join the sections and a no-slip mono loop to attach the fly. Having landed 513 Permit in his lifetime – it’s hard to find a better source for advice on Permit than Del Brown.
TARPON, BARRACUDA & SHARK LEADERS
For juvenile tarpon in the 10 – 50 lb. class, there’s no need for a complex IGFA sanctioned leader. We like simple, clear mono leaders: 4 feet of 40 lb., 3 feet of 30 lb, 2 feet of 20 lb., and a shock tippet 40 lb. For larger tarpon, we recommend shock tippets of 60 lb or 80 lb. Use a Stu Apte Improved Blood Knot to attach the shock tippet. For barracuda use at least 6” of wire. For sharks use 24” of wire, or more.
CHECK YOUR LEADER
Check your leader regularly for wind knots or abrasions and replace if worn or weakened.
KNOTS
Most fly lines come with a built-in loop at the tip. A nail knot butting up against the loop creates a strong knot that will not slip.
For connecting the leader butt to the fly line, the nail knot is fine with conventional fly lines. However, when using the newer mono core (or braided mono core) lines, you MUST use an Albright Knot. Conventional nail knots can slip off mono core fly lines. With Mono, use a double or triple surgeon’s knot when tying leader to leader and the non-slip mono loop knot when tying the tippet to the fly. With Fluorocarbon, use an 8-turn blood knot or the Stu Apte Improved blood knot when tying leader to leader, as fluoro can be weakened by a surgeon’s knot. The non-slip mono loop knot works well with mono or fluoro, when tying tippet to fly.
TEST YOUR KNOTS
Every time you or the guide ties a section of leader to leader, or you tie the tippet to the fly, you should test the knot strength by affixing the fly to something stationary and pulling firmly. More fish are lost due to leader or knot failure than any other reason.
VISION
Polarized sunglasses are so indispensable when fishing the flats, we recommend you bring at least two pairs (one primary, one back up). The best all-around lens colors are brown, copper or amber. Yellow lenses are good for flat, low-light conditions such as early or late in the day, cloudy or rainy days. We don’t recommend grey lenses. They can be excellent in extremely bright conditions, but the grey lens washes out the grey in the bonefish, making their usefulness on the flats extremely limited. Glare is a frequent issue when sight fishing. The Costa del Mar 580 Green Mirror copper lens provides a slight reduction in glare over non-mirrored lenses. Glasses that fit well with side shading are desirable. A strap is helpful for taking glasses on and off. A lens cleaning cloth (which must be kept dry) and a solution to clean your lenses works when you’re on the water. At home, washing the glasses with a mild dishwashing liquid, then drying with a microfibre cloth does the trick.
A long-billed hat with dark underside also protects your face and improves your vision.
CLOTHING
Dull or muted colors like olive or khaki are less visible to fish. We also recommend light blues or newer water camo colors. Light colors absorb less heat. We recommend quick drying materials for shorts or long pants when wading. If traveling to areas where you’ll do a lot of wading, you may want to have more than one pair of each. When it’s buggy or if the sun is intense, most anglers wear long pants and long-sleeved shirts every day and tuck the pants into their gravel guards or wading shoes to reduce the drag of the pant leg when wading. A Buff or a hoodie to cover your neck, ears and face, as well as sun gloves for both hands are also important items for sun protection.
RAINGEAR
Windy days can cause rough weather and boat spray. Rain can occur at any time. We recommend you bring a set of rain gear (jacket and pants) to carry with you in the boat each day. A light rain jacket also doubles as a windbreaker.
SPLASH PROOF BAG
Bring a waterproof or splash-proof bag for your camera and extra clothing (flats skiffs never seem to stay dry). Carry two hats and two pair of polarized glasses. Use a hat clip to connect your hat to your shirt so it won’t blow completely off. Carry a pair of pliers and a hook-sharpening file with you at all times. Always carry extra clothing on the boat to protect you from sun, wind, rain or a sudden drop in temperature. Specifically, we recommend you carry lightweight long pants, light weight long sleeved shirt, a light fleece and a rain jacket and pants (as described above).
FISHING TOWEL(S)
Carrying a fishing towel is a good idea. A washcloth size towel is perfect for cleaning your hands. A larger, medium-sized towel is good for drying off items, including yourself, plus, it doubles as a “rod protector”. Frequently, flats skiffs in far off places have less than ideal storage for fly rods and a towel can come in handy protecting your rods for chaffing and banging. Use the towel to wrap around your rods at the location they come in contact with the rod holding hole, tube or device. A towel can also come in handy to clean and refresh a dirty fly line in the middle to the day.
WADING
There are different types of wading. There’s casual wading, where you choose to jump out of the flats skiff to cover a specific flat, or chase down a sighted fish. In these situations, you can generally see the terrain you’ll cover, cover it, then get back in the boat. Casual wading is available pretty much anywhere you bonefish. For casual wading, a pair of neoprene flats wading booties or sneakers may be sufficient.
The other type of wading is to park the boat and go on foot. Wading the whole day can take you far from the boat. Chances are you will not be able to anticipate the terrain you might cover. All day wading requires a wading boot designed for the task. The wading boot must be comfortable to walk in for long distances (8 miles a day is not unusual). It must provide support and protection from sharp objects like shells, urchins and nasty dead coral. Inevitably, you’ll encounter soft sand, which will swallow up your entire wading boot and more. Destinations where you can enjoy all day wading include specific locations in the Bahamas or the Yucatan of Mexico, Los Roques, South Caicos, the Turneffe Islands, Belize, Seychelles, St. Brandon’s, Mauritius, Christmas Island and other atolls.
There are wading boots designed to stand up to all day wading sold by Simms, Patagonia, Orvis and others. It may take trial and error to determine the best wading boot for you. Add gravel guards and a pair of comfortable wading socks and you’re doing your feet a favor.
Whichever you choose, the idea is for the boot to withstand rugged terrain, as well as provide traction on slippery sand. The gravel guard helps keep sand from getting into your boot even when you sink in over your ankles. We like the Simms Guide Model Gravel Guard because of its wrap around design and Velcro closure.
For people with foot issues, adding athletic insoles or orthotics to your wading boots may be necessary. Keep in mind that you may need to size your shoe accordingly.
If you’re purchasing a new pair of wading boots and you’re traveling to a destination that offers all day wading, you’ll need to “break in” your wading boots way ahead of time. We’ve heard complaints of wicked blisters and sore feet from anglers who either didn’t have properly fitted boots or didn’t break in their wading boots prior to their trip. The best way to prevent this is to assemble the various wading gear, try it all on and walk around the house. You can quickly tell if your boots are sized properly. You don’t want to feel any pressure points during this trial. And, by not wearing the boots outside, you can return or exchange them, if they aren’t comfortable. Once you’ve made the decision that they are comfortable, then comes the break in period. For that, you need to spend a lot of time in the boots. We suggest taking long walks in the boots and socks. You own the boots now, but you may be able to make adjustments to make them more comfortable. If you develop a serious objection to the boot, find another one that’s more comfortable. We know people who didn’t fuss with this “break in” process and couldn’t walk without pain on the second day of their trip. We don’t want that person to be you!
Ideally, you want to pack light when traveling. It’s kind of a pain to bring two pairs of wading boots/shoes. An angler who weighs 160 pounds can probably move around the bow of a flats skiff in Simms Flats Sneakers without making much noise. Such a person can fish effectively from a boat or in the water with the same footwear. With heavier boots or heavier anglers, it might be impossible to move or shift your weight on the bow of the skiff without spooking bonefish. If that’s the case, fish from the boat with regular sneakers, bare feet or stocking feet and put on the wading boots when it’s time for wading.
Some bonefishing locations offer more wading opportunities than others. Where wading opportunities exist, it’s usually a good idea to wear or carry wading shoes with you every day. There may be times you’ll need to get your feet wet, even if you don’t end up wading. Carrying wading shoes on the boat allows you to take advantage of wading opportunities whenever they exist.
ESSENTIALS FOR WADING
You’ll need a belt pack, chest pack, backpack, or at least some pockets to carry your essential tackle in. Essential tackle when wading includes: clippers, pliers, hook sharpening file, box of flies, extra leader material, bug spray, sun cream, and a water bottle. You’ll want a good pair of polarized sunglasses, glasses cleaning solution and wipes. Asprin or Advil can come in handy. For sun protection, a Buff or a lightweight hoodie, long sleeved shirt and pants. A small family band radio allows you to communicate with your guide and fishing partner if you separate, but are still in close range.

FLIES
The flies listed in the final pages of this write-up are tried and true bonefish patterns whether you fish in the Bahamas, Turks & Caicos, Mexico, Belize, Venezuela, Seychelles or Christmas Island. This fly selection represents the most important colors and more importantly will allow you to fish a variety of water depths. You will lose bonefish flies for a variety of reasons. Break-offs can occur when a bonefish makes its initial run. Sometimes flies are damaged while removing the hook. Some flies may be lost to mangroves, coral or to barracuda. The durability of individual flies also varies greatly. Depending on your fly selection and your hooking success, you may go through 6 or more bonefish flies a day. To be safe, we recommend bringing at least 50 flies for 6 days of fishing. Because the weight of the fly is so important, you’ll want to have your most popular flies in several different weights. And don’t forget to add weed guards.
Many anglers are fishing barbless hooks now, so you may want to crimp your barbs in advance. If you’ve never fished barbless before, let us assure you that it is extremely effective and it is unlikely you’ll lose fish because of this.
HOOKS
There are 2 major hook types: “stainless steel” or high-carbon, plated hooks. “Stainless” hooks are more resistant to rusting and can be sharpened when the hook point dulls (and should be sharpened regularly). The high carbon, plated hooks are chemically sharpened, and should never be sharpened with a file or hone. The tin plating is also more susceptible to rust, and can break, particularly where salt gets trapped between the material and the hook (such as at the bend of the hook or under bead-chain or lead eyes). There are many high-quality saltwater hooks, such as Tiemco, Gamakatsu, Daiichi, and the newer Mustad Signature Series. We recommend against using the older Mustad 34007 or 34011 series hooks, which bend easily, and avoid using the Gamakatsu SC-15 wide gap, which, in smaller sizes, are not strong enough for bonefish.
KEEP YOUR HOOK SHARP
Be sure to check your hook point periodically, especially after landing a fish, or if you think you might have ticked it on the side of the boat while casting or on a piece of coral during the retrieve. If it’s a high carbon, plated hook and the point is bent, tie on a different fly. If it’s a “stainless steel” hook and the point is bent, sharpen it. There are several hook sharpening methods, which are too detailed to explain here. The most popular method of sharpening is to triangulate the point using a hook file.
Reference this quick video by Tom Richardson illustrating this method.
TECHNIQUE
One of the biggest mistakes a bone fisherman can make is not to adjust his fly to changing water depth. Your fly should be weighted such that it sinks quickly to the bottom and then stays near the bottom within view of the fish after you begin stripping. If you strip the fly above a bonefish, it will never see it.
TYPICAL DEPTH
The average flat depth, whether you’re wading or poling is 2½ ft. In this depth, a Gotcha or Crab Fly with medium sized bead chain eyes should provide close to the perfect sink rate, without overweighing the fly (and potentially spooking the fish). A good rule of thumb is your fly should reach the bottom in about 3 seconds. If you find your fly is not getting to the bottom, you should switch to a heavier fly.
DEEPER FLATS
The angler who is willing to fish deeper flats will often be rewarded with the largest bonefish. Big bonefish prefer the protection of deeper flats or shallow flats close to deep water. When you’re fishing water 3-4 feet deep, you’ll need a fly with lead eyes to get to the bottom quickly. A proven deep-water fly is a lead eye crab. Another killer, deep-water fly is the Simram, which is a fuzzy (rabbit fur) version of the Gotcha fly with lead eyes. Another outstanding lead eye fly is Henry Cowen’s Bonefish Scampi. Lead eyes come in a variety of weights and for joy of casting, you’ll want to carry flies with the smaller lead eyes, as well as the heavier lead eyes.
SHALLOW FLATS & TAILING FISH
One of the prettiest sights in fishing is a happily feeding bonefish with his tail waving in the air. The last thing a bone fisherman wants to do is scare the daylights out of an actively feeding fish by casting too heavy a fly too close to the fish. Therefore, you must go light in skinny water. By light we mean no weight other than the weight of the hook. For this we recommend mono (or plastic) eyes and a body that lands softly. A well-designed fly for this situation is a pattern called the bunny bone.
The bunny bone is made with rabbit fur and plastic eyes. Good color combinations would be gold/tan, tan/orange, chocolat/pink. Tie this fly in sizes 4, 6, and 8. You can throw this unweighted fly quite close to a tailing fish. Its entry into the water is soft, but it sinks well. The rabbit fur makes it look alive even before it’s stripped. All you need do is give it the tiniest of strips. Sometimes you don’t even need to strip. Above all, don’t strip the fly too far or too fast when working a tailing fish.
WEEDLESS FLIES
Wading anglers will encounter bonefish in shallow water, sometimes less than a foot deep. Some of the best tailing fish habitat is a weedy bottom. When fishing over these skinny, grass flats, you’ll need a weedless fly. We recommend using a small (size 6 or 8) light wire hook, like a Daiichi x452 or Gamakatsu SL45 Bonefish hook (black finish). A highly effective fly is a bunny bone with mono or plastic eyes and a 10-lb test V-shaped weed-guard. When casting from the boat, you’re apt to find bonefish on weedy bottoms at all depths, so it’s wise to carry weedless flies in all weights and sizes.
CRABFLIES
Crab patterns have come a long way since George Anderson introduced us to the McCrab. Actually, the Mc Crab has a design flaw. It’s all deer hair. To get deer hair to sink it must be loaded with lead. To cast it you need a hard hat. Del Brown corrected this flaw by forming the body of his Del Brown permit fly with Aunt Lydia’s rug yarn. This fly sinks quickly with a lot less lead. Jan Isley used ram’s wool and epoxy in creating the Rag Head. Enrico Puglasi uses EP Fibers. The guides at Alphonse Island use body tubing on their ingenious Alphlexo crab. When tied in smaller sizes (size #2, #4, and #6), crab flies are much more enjoyable to cast and perform well on medium to deep flats for bonefish and permit.
HANDY SELECTION
Before you begin fishing, it’s advisable to have a handy selection of the flies you’re most likely to use that day. Have a selection that covers all water depths, so you’re prepared when a quick change is required. For even quicker adjustments to changes in water depths, have a spool of lead wire handy and wrap a small piece around the eye of the fly, as needed.
BEFORE YOU CAST
All fly lines, especially monocore lines, are subject to “twists” and “coils” (memory). Twist is caused by not casting the entire length of fly line, and each time you reel in a portion of the line, some twist will develop. The best way to remove twist is to strip the entire line off the reel (to the backing), cut the fly off and trail the entire line behind the boat. Coil is caused by “memory”, when a line has been tightly coiled on the reel for extended lengths of time. Until someone develops a fly line with no memory, the most important thing you can do before you step onto the foredeck to cast is to gently stretch your fly line! The quickest and easiest way to stretch your line is to strip out as much line as you can cast, then hold a 10-foot section in both hands, step on the middle and stretch the line against your foot. Keep stretching 10-foot sections until the entire line is stretched. Apply about 4-lbs of pressure, hold the light pressure for a few seconds, and the coils will vanish. DO NOT “jerk” or “stretch the hell out of it”! This can damage the coating as well as the core and greatly shorten the life of your fly line.
Even better, start the night before. 1) Stretch the line. 2) Let it soak a while in a bucket of warm water and dish soap. 3) Dry it with a towel as you reel it up. 4) strip the cleaned line off the reel onto a clean surface (like a bed sheet) in large, loose coils overnight. 5) Get some sleep! 6) The next morning, apply cleaning solution as you wind it back on the reel. This process reduces memory and friction.
ONCE YOU’RE ON DECK
Strip out as much line as you can comfortably cast, cast the line, then strip it back onto the casting deck so that the line closest to the reel is at the bottom of the loosely coiled line you have now accumulated on the deck. Next, get about 10 or more feet of fly line (plus your leader) out of the rod tip. Hold the fly in one hand and the rod in the other. When a fish is spotted, toss the fly into the water and begin to cast.
Holding the fly at the bend of the hook is the safest position to avoid hooking yourself should the leader catch on something unexpectedly.
GUIDES
Here’s a tip that will help you and your guide, compliments of Joe Clear, one of the Bahamas all-time great guides. Once you’re onboard, but before you start looking for bonefish, go through this drill with your guide.
Strip out a comfortable amount of line for you to cast. Ask the guide to act as if he has spotted an imaginary bonefish and to give you his command…”bonefish 10 o’clock – 50 feet”. You then make the cast as you heard it described. Now, compare notes. Ask the guide if that is the direction and distance he called for. Frequently the guide’s view of the clock from the back of the boat is different from the angler’s. Even more frequently, 50 feet means something entirely different to the guide and the angler. Coming closer to understanding the finer points of direction and distance before you see fish should drastically improve your communication with the guide throughout the rest of the day. It’s also helpful if the guide knows your maximum, “comfortable” casting distance.
CASTING
Cast very close to a tailing fish, as he is focusing on a small area. With cruising fish, lead them so they can’t hear your fly hit the water, usually 6-12 feet (depending on depth and current). Allow your fly to sink to the bottom before beginning your retrieve. It is better to cast short, hoping the fish will come to the fly, than to cast too far and risk having the line spook him. When casting from a boat, take your shoes off; it will help you avoid stepping on the fly line.
The most common mistake anglers make when fishing the flats is taking too many false casts. Try to take no more than 4 false casts to reach a fish, hopefully fewer. When a guide positions the boat and sets up on a fish, the amount of time the boat stays in prime position is about 6 seconds. That’s generally enough time for 3 or 4 false casts.
RETRIEVE AND SETTING THE HOOK
The idea is to get the fly to the bottom as quickly as possible before the fish reaches the fly. When the fish comes within view of the fly (generally 3-4 feet away), you move the fly to get the fish’s attention. There are exceptions.
Click here to answer the question: To strip or not to strip.
The most common retrieve is a strip / pause retrieve, where after each strip, you pause, so that the fly begins to settle to the bottom, imitating the motion of a shrimp. A dropping fly will invariably result in a take from a feeding fish. If the fish goes nose-down, tail-up in the vicinity of your fly, he’s taking the fly.
When a bonefish takes the fly, you will feel resistance with your line hand as you begin the “strip” part of the retrieve. Normally this gradual pulling against the resistance is all you need to set the hook. Avoid setting the hook with your rod tip.
If the fish did not take the fly, do the same thing again, perhaps with a more active strip to start, then let it sink to the bottom. The majority of hookups and the best hook sets come when the bonefish goes down on the fly, not when he’s chasing the fly straight on.
However, if dropping the fly doesn’t work, try a long slow retrieve, giving the fly the appearance that it is escaping.
Many bone fishermen can spot a cruising bonefish under good conditions, but they can’t make out the subtle movements of the fish when it’s behind or near the fly. Most guides can see exactly what the bonefish is doing. Therefore, they know when the bonefish has picked up the fly. That’s why you should encourage your guide to talk you through the stripping process. It goes something like this:
Guide: “Okay, leave the fly there. Let it sink. Okay, now short strip. Another short. Let it sink. Long strip. He’s on.”
What makes the stripping process more complicated is the action of wind and current on the movement of the boat. If the boat is drifting towards the fish, you’ll need to make long strips to pick up the slack. If you’re drifting fast and the guide says the fish has taken the fly, you may actually have to strike with both your hand and the rod to take all the slack out of the line. Striking with the rod is generally something you only do after you’ve felt the fish with your strip strike. However, if you can’t possibly take up the slack with your hand, you may have to go for broke and use the rod too.
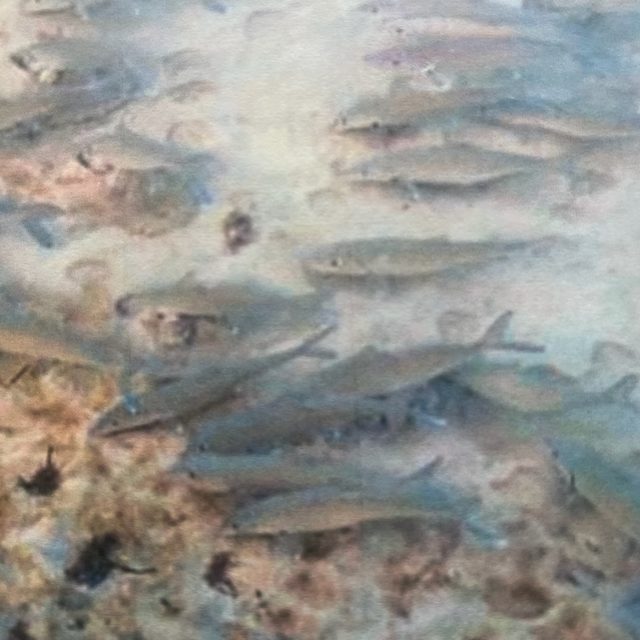
BONEFISH STRATEGIES
An ideal scenario is a fertile flat bordered by mangroves on one side and deep water the other.
On the outgoing tide, target bones leaving the mangroves heading to deep water.
On the incoming, do the opposite. The fish coming in are usually more aggressive. They’ve waited out the slack tide and are raring to go.
A fertile flat is typically a soft, sandy bottom with patches of grass or weeds. These flats hold far more shrimp, crabs and clams than clean, hard white sand. A surefire way to identify such a flat is the presence of feed sign (see more on feed sign under “How to Spot Bonefish”).
Find where bonefish first enter this flat from deep water and be ready to greet them the moment the tide starts moving in. They’ll be eager and so should you.
Don’t judge the tide by things moving on the surface as they’re affected by wind. Instead, stand in a foot or two of water, kick up sand and watch which way it flows …. in or out.
It’s best to have the wind and sun behind you, fish coming at you. A fish coming at you has less chance of seeing you than a fish on either side.
RELEASING BONEFISH
The best way to release a bonefish is to handle the fish as little as possible. Instead of grabbing the fish, grab the fly with your pliers and twist the fly loose. If you’re using 15-lb. Maxima tippet, you can hold onto the leader at the fly (with normal 3-8 lb. bonefish) in one hand and get the pliers on the hook with the other. If you bent your barb down, the hook will remove itself with a simple twist of the pliers. You should avoid touching the bonefish, because once you touch it, it releases a mucous-like slime that emits a scent that sharks can track.
Two organizations, Bonefish Tarpon Trust and Keep Fish Wet, are getting the word out on best practices for releasing fish.
Check out these links:
Catch and release fishing is a valuable conservation tool that can lead to more and bigger fish in the fishery. However, just because a fish swims away doesn’t mean that it lives to be caught another day. The Bonefish Tarpon Trust has assembled some tips for increasing the chances that a released bonefish survives. Click here for more information on the best practices for fighting, handling and releasing Bonefish.
What to Bring – Fishing the Flats
BONEFISH
- #7 to #9 Rod
- Saltwater reel which holds at least 150 yds. of 20 lb. backing
- WF floating line
- 7-14 foot leader with 12 – 15 pound test tippet
BONEFISH LEADERS
Remember, we recommend the strongest tippet possible for your fishing situation. The following are only examples.
Mono to Fluorocarbon Leader: For the first 3 sections use Mason: A 4′ butt of 25-lb., 2′ section of 20-lb, 18″ of 16-lb. Then add 2 sections of fluorocarbon, as follows: 18″ of 20 lb.; 2′ of 15 lb. makes an 11-footer.
All Monofilament Leader: 5′ of 25 lb., 2 1/2 ‘of 20 lb., 15″ of 16 lb. (all Mason), plus 27″ tippet of 15 lb. Maxima Green gives an 11-footer.
TARPON
- #10 to #12 Rod
- Saltwater reel holding a minimum of 250 yds. of 30-lb. backing
- WF floating and intermediate are the most commonly used lines.
- Leader with 15-20 lb. class tippet & 40 – 80 lb. shock tippet
PERMIT
- #10 Rod
- Saltwater reel holding a minimum of 200 yds. of 30 lb. backing
- WF floating line
- Leader with 15-20 lb. tippet
BARRACUDA & SHARKS
- #8 to #10 Rod
- WF floating line
- Saltwater reel holding a minimum of 200 yds. of 30 lb. backing
- Leader with 6″ shock tippet of 30 lb. wire or nylon-covered braided wire for barracuda. 24″ of wire for sharks.
BONEFISH FLIES:
- Gotcha fly
- Clouser Deep Minnow -tan & white, green&white
- Simram or Shrimp Scampi
- Crab flies
- Mantis & Spawning Shrimp Patterns
- Brewer’s Amber Shrimp
- Mini Puffs
- Bunny Bones
- Bonefish Bitters
See below for more detailed information on bonefish flies.
TARPON FLIES:
- Shallow water tarpon flies like the Stu Apte, Black Death, Cockroach, or EP Black & Purple #1/0 to #3/0
- Deep-water tarpon flies #2/0 to #4/0, like the whistler series in red and white, yellow and red and orange and grizzly.
- Tarpon Toads or Bunnies #1/0 to #3/0; Char & Yellow, Black & Purple, purple, rusty orange, red & black
- Deceivers #1/0 to #3/0; blue & white, green & white.
PERMIT FLIES:
- Del Brown Permit Fly
- Rag Head
- EP Crab; olive / tan
- Mantis Shrimp patterns like Peterson’s Spawning Shrimp, Squimp, or Crimp.
- Also Clouser Minnows and various other Crab flies
BARRACUDA FLIES:
- A sparse needlefish Fly (chartreuse)
SHARK FLIES:
- Yellow / Red Deceivers size 3/0 or bigger
Spin-Fishing on The Flats
BONEFISH AND PERMIT
- Rod: 6½’ – 7 ‘ light (for bonefish); Medium (for permit).
- Reel: Open faced (skirted spool) reel with 200-yard capacity.
- Line: 8-10 lb. test. Extra spool of 10-12 lb. test.
- Lures: 1/8-1/4 oz. Up-riding Flat Willie jigs, Millies jigs #155 or Bills jig worms. Also 1/0 – 3/0 bare hooks for bait.
- Colors: Pink, yellow, white, brown.
TARPON
- Rod: 6½ ‘- 7½’ light medium weight
- Reel: Open faced reel with at least 200-yd capacity.
- Line: 15-20 lb. test. Extra spool of 10-15 lb. test.
- Lures: Silverspoons, red & yellow spoons; 3″ long silver-sided, dark back diving lures, like Rat-L-Trap, Jumpin’ Minnow Plug, Chrome Bombers; Mirro-Lures (52M and 65M). Also, an assortment of ¼ – ¾ ounce bucktails in white and yellow and 3/0 bare hooks for bait.
- Colors: Red/white, red/yellow, yellow/orange, green/silver.
- Leaders: 80-100 lb. test shock tippets.
BARRACUDA
- Tackle: Same as above.
- Leader: 30-60 lb. wire
- Lures: Green, red and orange tube lures (8″-12″ surgical tubing).
REEF OR BAIT CASTING – FOR LARGER SPECIES
- Rod: 6″ medium to stiff action (for deep jigging, use a stiff rod).
- Reel: With smooth drag and capacity for 200-yds 12-20 lb. test.
- Jigs: 1½-4 oz. white jigs. Add a 7″-9″ curly tail worm in yellow, orange or green.
- Bear in mind that many Bahamian guides prefer fishing bait rather than lures for bonefish and permit and locally available bait will be provided by your guide.
BAHAMAS: Equipment & Clothing Checklist
Daytime temperatures during the season range from 70°-95° and can drop into the 60’s (or less) at night. The sun is strong and you need to protect yourself from sunburn. We suggest you bring a couple of light-weight long-sleeved shirts and some light long pants. There is no need for formal clothing. Patagonia, Simms, Columbia and Ex-Offico all make state of the art outdoor clothing designed for the tropics.
- Light weight, quick-drying long pants (2)
- Light weight, quick-drying long-sleeved shirts (2)
- Wading Shoes, Wading Socks, Gravel Guards.
- Second pair of “boat” shoes
- Wide brimmed hat (like upper/downer) to protect neck and ears. 2nd hat for back-up and two hat clips.
- Light weight rain jacket and pants for rain showers/boat spray – doubles as wind breaker
- Shorts (quick-drying)
- Short-sleeved shirts (quick-drying)
- “Wicking” underwear
- Bathing suit
- Fishing towel
- Two pair of Polaroid sunglasses, with straps and side shields. Wrap around style also offers lateral eye protection.
- Bandanas, Buffs or Hoodies
- Thin gloves for sun protection
MISCELLANEOUS
Sun creams: SPF#15 – 45 strength waterproof sunscreen as well as lip balm with sunscreen
Insect Repellent: Spray for mosquitoes, sand flies and horseflies.
Zip-Loc Bags: Large and small to keep items dry. Fill one with a lens cleaning cloth to clean glasses, etc.
Toiletry Kit: For cosmetics, medications (such as Transderm II or Dramamine for seasickness, aspirin, Advil, antihistamines, antibiotics, ear plugs, etc.). Also talc or some form of powder.
First Aid Kit: With band aids, antibacterial ointment, adhesive tape, etc.
Camera Gear: Waterproof bag, memory cards, polarizing filter, lens tissue, cleaner, flash, extra camera batteries and accessory batteries.
Gear Bag: Small pack, belt attached bag or backpack for carrying tackle/camera while wading.
Travel Documents: Passport, birth certificate with photo ID or proper documents for your destination (refer to your Angler Adventures itinerary letter for details); Travel Insurance documents (recommended for every trip)
Other: Cash (small bills) for tips, Traveler’s Checks, travel alarm clock, flashlight, Kleenex, Band aids, duct tape.
Carry On Bag: To carry valuable fishing gear, change of clothing, prescription medications and necessities aboard the airplane.
Reading Material: Bring books (particularly ones you don’t mind leaving at the lodge) and perhaps DVDs if you are bringing your own laptop.
ACCESSORIES
- Clippers with sharp point to clear eye of fly
- Hook sharpener
- Fly line dressing (for keeping lines slick and clean)
- Chatillon Scales (optional)
- Reel oil, Sentry Tuf-Cloth or WD-40 to apply after washing.
- Spare fly lines and backing
- Ferrule wax; use only if your rod sections have a slippage problem
- Reel mitts to protect reels
- #2 lead wire to weight flies.
- Stripping basket, only necessary when wading the surf.
- Fishermen’s pliers, needle nose pliers, forceps.
- Pair of Rubbermaid jar openers (to disjoint stuck rod sections)
- Water bottle
- Oversize tip tops and stick of Ferrule cement
SUGGESTED REFERENCE BOOKS
“Fly Fishing in Salt Water” – Kreh
Fishing the Flats” – Sosin and Kreh **** “Fly Fishing for Bonefish” – Brown
TYING BONEFISH FLIES
Anyone possessing the fly-tying fundamentals required to tie a bucktail streamer can tie effective bonefish flies. All that is needed are the basic tools: vice, bobbin, scissors & whip finisher; a supply of salt water hooks; and an assortment of materials.
HOOKS: Tiemco #811S, Gamakatsu SC12 & SC11-2H, Daiichi x452, and the Mustad Signature Series.
THREAD: Pre-waxed Flat Nylon (210 Denier), 3/0 (115 Denier) or 6/0 (80 Denier) are good choices depending on the size of the fly. Most important colors are white, black, tan, yellow and pink.
TAILS: Tails aren’t used on all patterns, but where called for, a variety of natural materials, i.e. calf tail, hackle fibers, wood duck flank, rabbit fur, or marabou, are used, as are synthetic flash materials such as Flashabou or Krystal Flash.
BODIES: Braided Mylar, Body Braid, Aunt Lydia’s Sparkle Yarn, Clear V-Rib, Chenilles, Krystal Flash, etc.
WINGS: Calf tail, saddle hackle tips, rabbit fur, marabou, synthetic fish hair or craft fur are useful. White, brown, tan, pink and yellow are the most common colors. Krystal Flash or Flashabou is often added. Some patterns call for grizzly or cree saddle hackle tips tied in as sides along a hair wing.
EYES: Vary the weights of your flies by the weight and size of the eyes; medium bead chain is the most common. For shallow water use small bead chain eyes, no bead chain eyes, plastic or mono eyes. For deeper water, lead / dumbbell eyes in a variety of sizes are effective. For example, while we recommend 1/50th and 1/36th lead eyes on the Clouser Minnows described below, you may want to experiment with 1/100th lead eyes as well. For tailing fish or skinny water use an unweighted fly (tied without any bead chain eyes) like a Bunny Bone. It is also important when you assemble your fly collection to have the primary colors represented: pink, silver/white, brown / tan / amber, gold / yellow and orange. Note: A simplistic approach to fly selection is to match the fly color to the bottom color. If the bottom is light in color, try a Gotcha. If the bottom is tan or dark in color, try crab. You can do well bonefishing with just these two patterns.
The flies listed here, and the materials to tie them, can be purchased through the Compleat Angler – 203-655-9400.
GOTCHA FLY (A CHARLIE VARIATION)
Hook Size: #2 – #8
Thread: Pink
Eyes: Medium Silver Bead Chain
Tail: Pearl Medium Mylar Tubing, core removed
Body: Pearl Poly-Flash Braided Mylar
Wing: Beige Craft Fur topped with 12 strands of Pearl Krystal Flash.
PETERSON SPAWNING SHRIMP:
Hook Size: #2 – #6
Thread: Fl. Pink 140 Denier (3/0)
Eyes: Medium Nickel, Lead or Bead Chain Eyes
Tail1: Orange McFlylon / Egg Yarn
Tail2: White, Tan or Cream Antron Yarn
Tail2 (opt.): 4 strands of Pearl Krystal Flash
Antenna: Black Krystal Flash
Eyes: Black Mono Epoxy Eyes
Legs: Tan Barred Crazy Legs
Body: Pearl Flat Diamond Braid / Bill’s Body Braid
Collar: Tan Zonker Rabbit Strip
CLOUSER’S MINNOW (GOOD, DEEP WATER, BIG FISH FLY): TAN & WHITE
Hook Size: #2 – #8
Thread: Tan
Eyes: 1/50th or 1/36th ounce dumbbell eyes with red iris
Body: None
Underwing: (Tied on top of hook shank, before turning over). Very sparse white bucktail 1½ inches long
Overwing: (Tied after hook is inverted). A few strands of gold Krystal Flash topped with very sparse tan or light brown bucktail, same length as underwing. Another effective Clouser pattern is green and white.
SIMRAM:
Hook Size: #2 – #8, upright in vice
Thread: Pink
Eyes: Medium (5/32″) to small chrome dumbbell eyes
Tail: 4 strands yellow Krystal Flash followed by golden tan Kraft Fur.
Body: Pearl glitter body (body braid).
Shell Back: 1-inch piece medium pearl Mylar piping, core removed.
Wing: 1½ inch piece of tan, crosscut rabbit fur strip.
BREWER’S AMBER SHRIMP:
Hook Size: #4 – #8
Thread: Yellow
Tail: Lemon Wood Duck
Body: Yellow Floss, overwrapped with Amber V-Rib
Eyes: Medium Silver Bead Chain
Wing: Light brown buck or calftail, sided with Cree saddle hackle tips.
BONEFISH BITTERS (BROWN OR OLIVE):
Hook Size: #4, #6 or #8
Thread: Color to match wing
Eyes: Bead chain
Body: Colored epoxy or hot glue
Legs: Silli legs to match wing color
Wing: Deer hair over Z-Lon or Antron underwing
BUNNY BONE TAN (GOOD PATTERN FOR TAILERS; SKINNY WATER):
Hook Size: #6 & #8
Thread: Beige
Eyes: White, black or gold plastic or mono eyes, tied in near bend
Fan Tail: Start with 5 half-inch pieces of gold mylar. Then overlay Tan Rabbit Fur (or dark brown rabbit fur with pink thread)
Antennae: 2 strands Copper Krystal Flash, 2½ X shank length
Body: If using plastic eyes and a size 8 hook, use Tan thread for body. If using small bead chain eyes or a size 6 hook, use Tan Aunt Lydia’s Rug Yarn (built up slightly around eyes and tapering to the hook eye).
MINI PUFFS (PINK; TAN OR RUSTY ORANGE)
Hook Size: #6 & #8
Thread: White
Eyes: Small silver bead chain
Tail (wing): White calf tail tied in at bend, appx. length of hook shank, topped with 4 strands of Pearl crystal flash and sided with grizzly saddle tips (splayed).
Body: Medium pink chenille, figured eighted around bead chain eyes to produce a “ball”.
DEL BROWN’S PERMIT FLY
Hook Size: Standard or long sharked sizes #1/ 0 – #6
Thread: Chartreuse
Weight: 1/24th , 1/36th or 1/50th oz. Dumbbell eyes.
Tail: 4 strands pearl Flashabou, and 4 ginger variant or cree neck hackles, tied splayed to imitate claws.
Body: Aunt Lydia’s Rug Yarn, 8 – 10 strips, approximately 2″ long, trimmed to round shape.
Legs: Four 1-1 ½ ” pieces of white rubber hackle, tipped red with a Sharpie Pen.